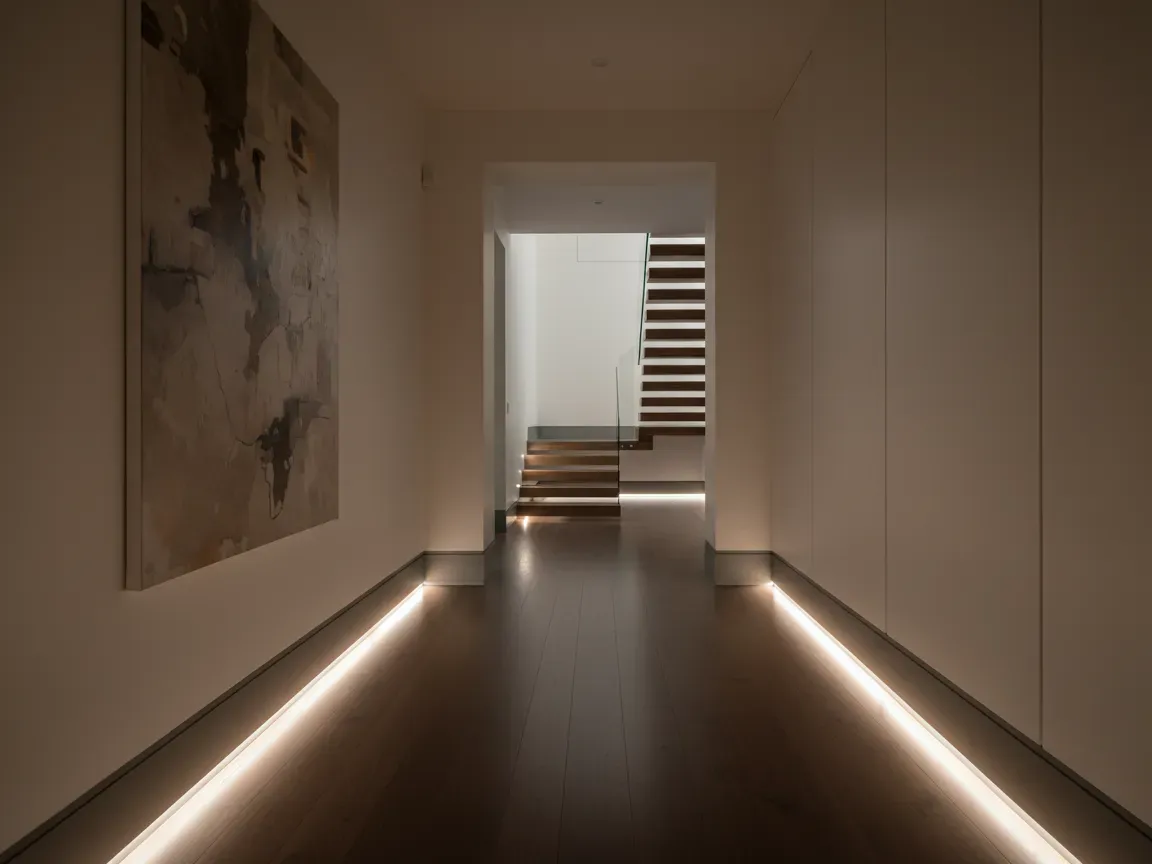
Navigating a dark corridor or climbing a staircase in the middle of the night can be surprisingly hazardous. Turning on bright overhead lights immediately shocks sleep-adjusted eyes, leaving you squinting and fully waking up anyone else resting nearby. At the same time, relying on complete darkness or weak plug-in nightlights often leads to stubbed toes, missteps, and clutter collisions. Low-level ambient illumination along the floor provides the perfect balance between practical visibility and calming ambiance.
Rather than retrofitting bulky wall sconces or cutting into drywall for recessed step lights, specialized baseboards offer an elegant architectural solution. These trim profiles conceal delicate wiring and provide a dedicated channel for flexible light sources. Taking on this project transforms plain passageways into safe, beautifully illuminated walkways using standard tools and approachable DIY techniques.
Why low-level illumination works best for dark corridors?
Floor-level lighting operates on a simple physiological principle: your feet require visibility to find traction, while your eyes remain shielded from direct light output. Overhead fixtures cast sharp downward shadows and produce harsh glare that can ruin nighttime vision. In contrast, grazing light across floor surfaces creates uniform reference points without overpowering the room.
When light emanates from the lowest edge of the wall, it clearly defines transitions between surfaces. This distinction is especially vital near doorways, floor thresholds, and stair risers. Even a minimal amount of indirect illumination allows the brain to map steps and perimeter walls accurately. The resulting environment feels calm and secure, helping family members move quietly around the house after sunset without disrupting household sleep cycles.
Tools and materials needed for baseboard lighting
Equipping your workspace before cutting the first trim piece ensures smooth progress throughout the project. While this installation involves simple carpentry and basic low-voltage electronics, precision tools deliver the cleanest results.
Before you start, gather these key supplies:
- Specialized baseboards designed with an integrated channel and frosted lens cover
- Low-voltage LED strip lighting (typically 12V or 24V in a warm color temperature like 2700K to 3000K)
- Appropriate low-voltage DC power supply (driver)
- Wire strippers, precision snips, and low-voltage extension cable
- Miter saw with a fine-tooth blade for aluminum or MDF profiles
- Construction adhesive, silicone sealant, or mechanical wall fasteners
- Digital multimeter for testing connections
- PIR motion sensors or smart micro-controllers (optional for automated control)
Choosing integrated profiles simplifies the entire setup. High-quality systems like LED skirting board lights combine durable baseboard moldings with built-in channels that secure the strip while acting as an effective heat sink to prolong light life.
How to plan wiring along stairs and hallways?
Successful low-voltage lighting depends on invisible wiring and consistent electrical delivery. Start by walking your hallway and stair pathways to identify convenient access points for wall outlets. The primary challenge involves concealing low-voltage supply cables running from the transformer to the start of each baseboard run.
For continuous hallway walls, locate the power supply inside a nearby closet, utility cabinet, or under the stairwell. From there, route thin low-voltage cable behind the existing drywall or along baseboard expansion gaps. When measuring your runs, calculate total strip wattage to ensure your driver has at least a twenty percent overhead buffer. This headroom prevents component overheating and extends hardware longevity.
Staircases require thoughtful cable routing because treads interrupt straight horizontal runs. You can route vertical feeder cables behind the stair stringer or through small holes drilled low inside the riser corners. To prevent noticeable voltage drop along long runs or ascending stairs, feed power into the circuit from both ends or run a heavier gauge parallel feeder wire that taps into individual steps.
Step-by-step installation of baseboard channels and strips
Begin by measuring your walls carefully. Cut the baseboard profiles to size using a miter saw fitted with a high-count carbide blade. If you are joining lengths at inside or outside ninety-degree corners, cut forty-five-degree miters to ensure the aluminum channel and cover snap together flush.
Attach the backplate or baseboard section directly to the wall studs using strong polyurethane construction adhesive or counter-sunk screws. If the wall is slightly uneven, use shims behind the profile to maintain a perfectly straight line so the frosted diffuser snaps on without buckling.
Once the profiles are firmly secured and the channel interior is cleaned of dust, unroll your low-voltage strip. Peel away the adhesive backing gradually, pressing the flexible tape firmly into the aluminum groove to ensure solid contact for heat transfer. Make sure all soldered or clip-on wire leads are properly aligned at your entry point. Snap the frosted diffuser cover over the strip to eliminate hot spots and produce a soft, continuous glow across the floor.
Power supply options and motion sensor integration
A modern lighting installation should run automatically without requiring manual wall switches. Choosing the right driver and sensing equipment determines how effortlessly the system fits into your daily routine.
Drivers convert standard household alternating current into steady direct current. You can choose a compact plug-in adapter if an outlet sits nearby inside a closet, or wire a hardwired driver directly into a dedicated junction box behind the wall. Always place the power supply in a well-ventilated enclosure where it can dissipate internal heat safely.
Pairing the system with passive infrared (PIR) motion sensors delivers maximum convenience. Position discreet miniature sensors at the top and bottom of your staircase, or at each end of the hallway just above floor level. When someone approaches, the sensors trigger the lights to illuminate softly. Integrating an adjustable delay module ensures the pathway remains lit until you safely clear the area, turning off automatically after thirty to sixty seconds of inactivity.
What makes illuminated trim a smart long-term home upgrade?
Beyond immediate nighttime safety, integrated trim lighting adds real architectural refinement to any interior. Standard builder-grade baseboards simply mask wall-to-floor expansion gaps, whereas illuminated profiles introduce functional modern depth to previously overlooked transition spaces.
These low-voltage systems consume minimal electricity, especially when powered by automated motion triggers or astronomical dusk-to-dawn timers. Running an entire hallway run for a few intermittent hours each evening accounts for negligible utility costs. Furthermore, keeping light sources close to the floor protects wall paint from finger marks often left behind when people feel their way down unlit corridors in the dark.
Creating lasting comfort through subtle nighttime illumination
Installing your own low-level floor lighting bridges the gap between home safety and elevated interior design. By routing low-voltage power through dedicated trim channels, you can modernize dark corridors and staircases without complex wall surgery or costly professional wiring overhauls.
This simple project yields immediate rewards every single evening. Instead of stumbling through pitch-black walkways or dealing with startling overhead fixtures, you gain a dependable, softly guided path that keeps your entire household safe and comfortable.